Managing processing
 ...version française de cette page ...version française de cette page |
Step Manager
The steps tree is managed in the Step Manager. This component allows you to create a valid step hierarchy. Once processing is performed, each step contains also the results it has created.
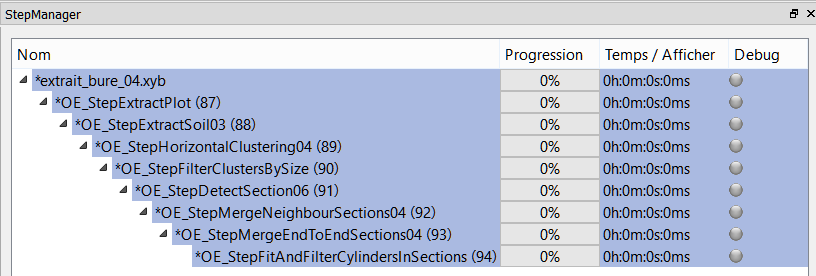
Step Manager*after creating a *steps tree, but before processing:
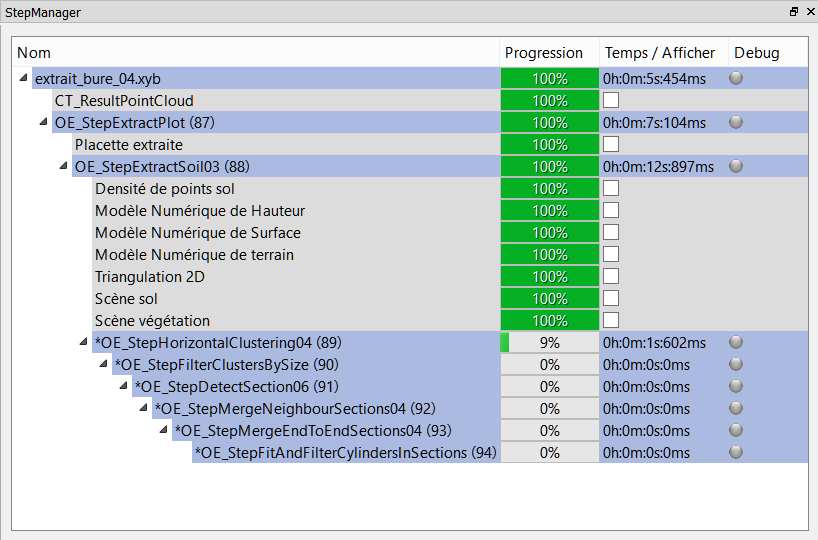
Step Manager during the processing of the steps tree:
Step Manager after the end of processing:
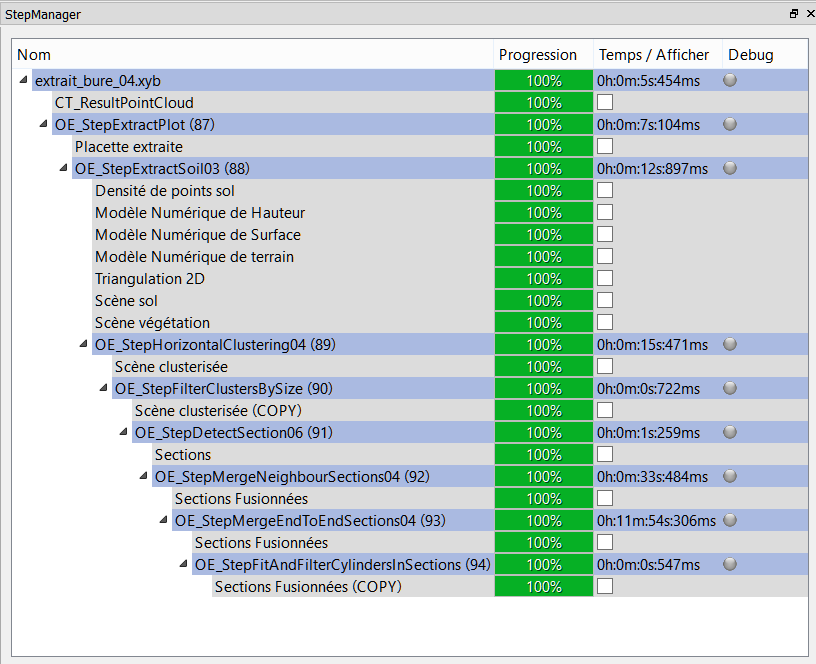
The first column contains the name of the steps, with arrows at left to collapse the hierarchy affiliated with each step.
After processing, it also contains the name of the results produced.
The second column contains a progress bar to monitor the progress of processing.
The third column stores processing time of steps (updated at the same time that the progress bar).
In the case of results, this column contains a checkbox. Checking this box, allows you to “send” the result to Model Manager. This has the effect of displaying the OUT result model of the step in the Model Manager (which will manage its display, as discussed in section Displaying items).
The fourth column allows for steps to enable debug mode.
To start the execution of the steps tree you must click on the button  . It can also suspend using the button
  .
.
To export the tree steps as a script, you must click on the button  . Scripts can then be loaded using the button
  .
.
Initialization of the steps tree
To initiate a sequence of steps, we must first insert an initial step.
It can be inserted:
- A Load File Step using the button
 . In this case, a file selection window opens, and loads data, once the file selection has been validated.
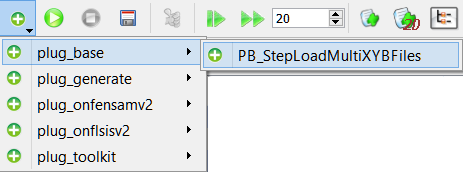
 - An Initial Step, using the button
 . In this case you must select the step in the plugins sub-menu that contains it. This step type allows for more complex loading (multiple files of different types, settings before loading, data creation...).
Adding children steps
Once inserted a starting point, adding other steps is done using the context menu: Right-click on a step for which you want to add a child step.

Elements of the step context menu :
The first part of the menu allows modifying the current step:
- Run: starts the processing
- Step Information: opens a window with detailed information about the step. This is the same window with the menu button Help / About plugins / Information about step (see General organization of the interface / Help menu). However from here OUT result models are available even for copy results.
- Configure input results: change the results taken into account for input, in the case where several candidates are valid.
- Configure: opens the box for setting the current step parameters.
- Delete: delete step (and all its children steps).
The second part of the menu contains a sub-menu for each plugin loaded. This sub-menu contains the list of steps for the considered plugin. Those in gray*are not compatible with the results produced by the current step. The others can be added. By leaving the mouse for a moment, a tool tip briefly describing the function of the step is obtained. By clicking, the step is added, what causes the display of the configuration window for *input results (if necessary), then the window for setting step parameters of the new child step.
Configuring a step
Once added, the step is (most of the time) to be configured.
First step analyzes the results of the parent step (or even the entire hierarchy, if the recursive search is active for the considered IN result model). This analysis selects result( s) consistent as input.
This selection works by comparing the IN results models of the added step with OUT results models of candidates results.
In the case where multiple results are valid, the window to configure the input results is open:
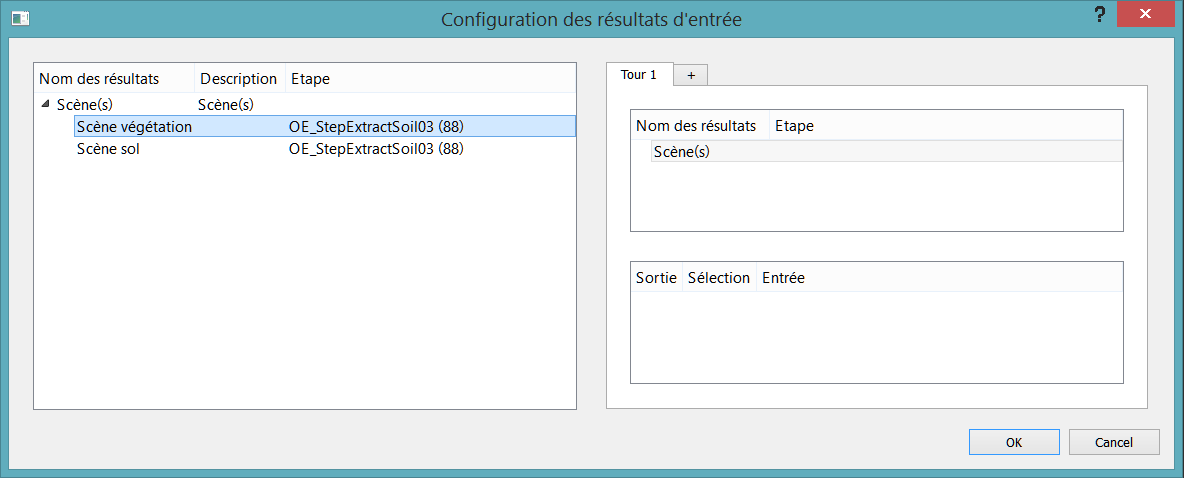
The left side lists candidates results, sorted by searched IN results models of the step. The number of the step bearing each result is shown in parentheses.
Double-clicking on a result will transfer the selected result as a validated correspondence to the right side (you can also drag the result from the left side to the right side).
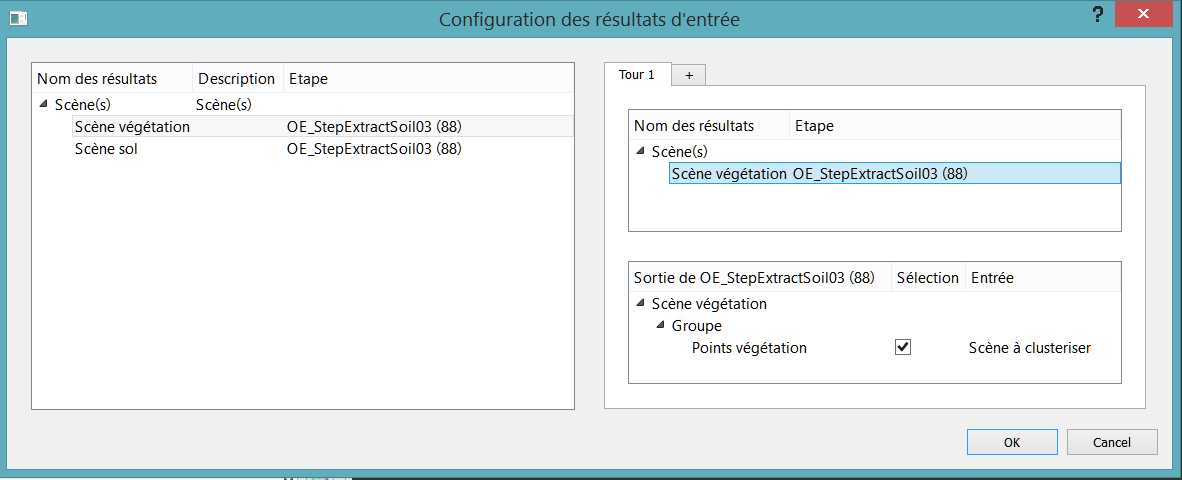
The right side displays the results matches validated above. On the right-bottom part, it is possible to select alternatives items / groups levels, if more than one possibility is valid.
Explanation of the concept of Turns
Once all choices done, simply click OK to validate the configuration if input results.
Then, if necessary, the window for setting step parameters opens. It contains all the adjustable parameters of the algorithm to run. For example their are the parameters for the OE_StepExtractSoil03 step:
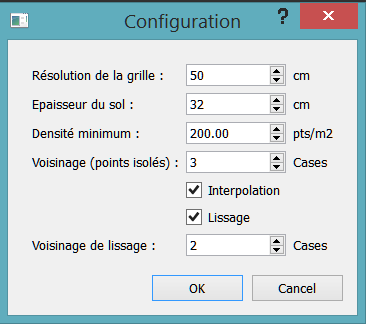
Once the parameters are selected and approved, the step is actually added in the steps tree.
| Previous (General Organization of the interface) | Back to GUI summary | Next (Displaying items) |
